
Enable WiFi on Polycom VVX-450

By default, the Polycom VVX450 small business phone is configured to connect via a wired connection. To enable the Wi-Fi functionality a USB Wi-Fi dongle needs to be connected to the device and the Wi-Fi option needs to be enabled from within the menu.
Start by inserting the USB Wi-Fi dongle into the USB port on the rear of the device. The Wi-Fi mode then needs to be enabled.
This can be done by following the below menu sequence:
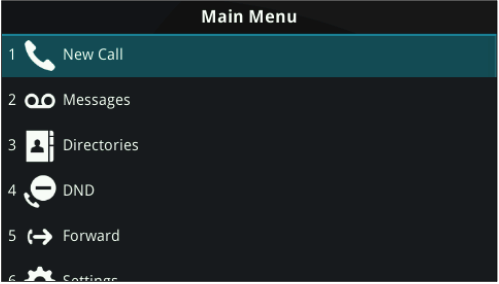
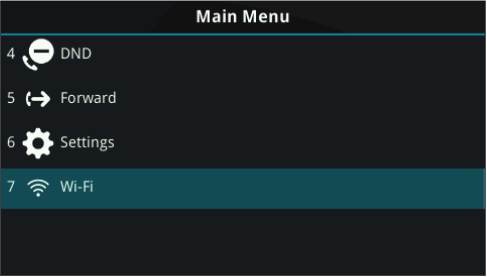
Entering the Main Menu and navigating down to option 7 “Wi-Fi”
Entering the “Wi-Fi” menu option will present the current status, which as default will be “Off”
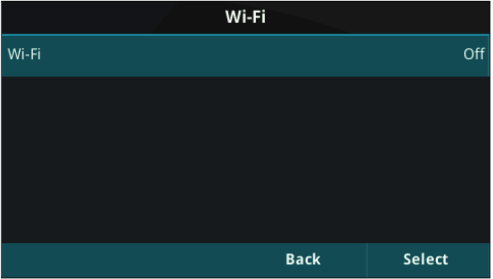
To enable this functionality, navigate down to “On” and press the “Select” key

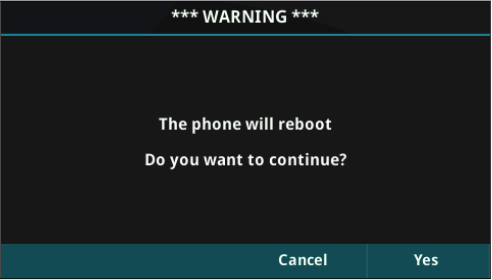
Once this is selected, the phone will advise you that it requires a reboot, select “Cancel” to go back or “Yes” to continue with the reboot.
It’s important to note that when the device boots up, it will no longer be able to obtain an IP address via the wired connection (Both Wired and Wireless cannot run in parallel)
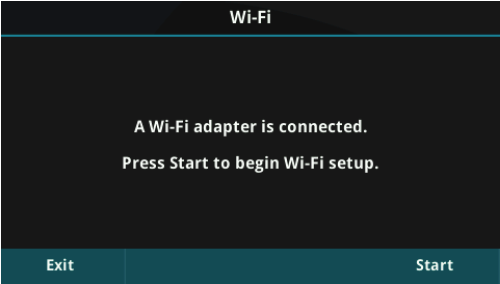
Once the device has started the above prompt will be displayed on screen, press “Start” to begin the setup.
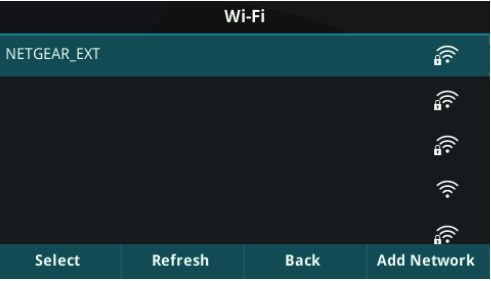
The ability to scan for a Wi-Fi network is presented. A list of available networks will populate this page and from here you can press “Select” to attempt to join that network.
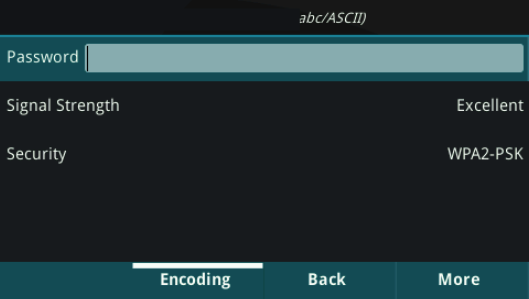
Upon pressing “Select” you will need to enter the appropriate security credentials for that particular Wi-Fi network. Once you have finished press the “More” option and then press “Connect”
The device will then join the chosen Wi-Fi network.
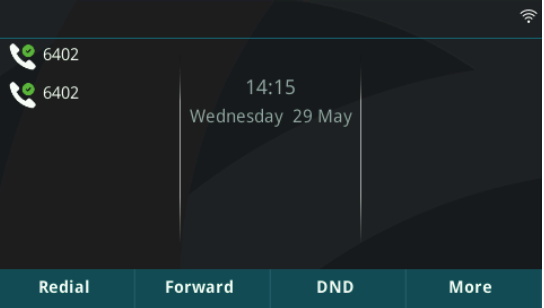
A visual indicator is present at the top right corner of the display.


